ClassPass Fitness Night Out | THE BAR METHOD

Monday night I finally got myself out of the house and downtown for a much needed solo workout.Most of my workouts these days involve pushing a double BOB or trying to fit in an at home barre or yoga class either while the kids are sleeping or during the day while I trip over them. That being said when I found out about the ClassPass Fitness Night out at The Bar Method I was all over it. Now this was my very first The Bar Method class and actually it was my first official bar style class because while I love my barre3 online program I still have never taken an official class. 

classpass-thebarmethod

The Bar Method here in Portland is located in the Pearl District. The location is perfect for me and I had no problem finding street parking which was great considering it took me 40 minutes (I left 45 minutes early) to get there from my house yesterday so I had no time to spare searching for a parking spot. 

I didn’t know what to expect when I arrived at the studio and honestly I was a bit nervous considering it was my first visit. Nothing to worry about though because as soon as I entered I was greeted with warm welcome of big smiles and hellos. I checked in, filled out my health history and waiver. Once all of the administrative tasks were completed I took a little tour of the facilities and let me tell you this studio is small but it is beautiful and fully equipped. There are lockers for you to use which include a key which is so prefect for me because I never remember a lock. There are also showers which is great for taking a class before or during your work day or maybe before heading out in the evening. 

classpassbarmethod

Finally I headed into the actual studio room (see above) and thankful another blogger I had met at an event the day before was also in attendance and had taken a bar method class before was there. She helped me out with getting the necessary items (two sets of weights and a towel) that I would need for the start of the class. Then it as go time! 

Processed with VSCOcam Processed with VSCOcam

You guys this workout seriously kicked my butt. I had an amazing time and the instructors are really great. During the class I received a little extra help because lets face it my form is a work in progress but I loved how the class was super hands on and personal – you don’t feel like you just an anonymous participant but actually are part of a group. The instructors provided little adjustments when needed as well as verbal instructions on how to improve positioning/stance which helped to make sure we all got the most out of the workout. 

Processed with VSCOcam

Conclusion: I will be back. I loved The Bar Method class and the studio and instructors. 

classpassjess

After the class there was a mini-reception in the lobby thanks to  ClassPass. We enjoyed snacks from Luna Bar and Portland Juice Co. Side Note: the best Portland Juice Co. juice (IMO) is the Karma. 

Thank you ClassPass (and Jess from ClassPass for including me in this event) and The Bar Method for hosting! I look forward to trying more classes via ClassPass and returning to The Bar Method in the next week or so. 

So all this mention of ClassPass – what in the world is it? 

ClassPass is a monthly membership to the best boutique fitness classes in your city. There are thousands of classes available to ClassPass members, including cycling, pilates, yoga, strength training, dance, martial arts, and more.

For $79 – $99 a month (price varies by city), ClassPass members get unlimited classes to studios in the ClassPass network. While members can take as many classes per month as they’d like, they can visit the same studio up to 3 times per monthly membership cycle.

ClassPass is located in so many cities around the US, Canada and even London! 

Have you ever tried The Bar Method? If yes, what did you think? How about ClassPass- have you given it a try? I just signed up for another The Bar Method Class for next week!

Disclaimer: I attend this event at no cost. I was not required to blog about my experience but I chose to because it was a great one. Additional Disclaimer: affiliate link included via “ClassPass” links. 

WIAW: DIY Smoothie Bowls

Okay so I know I am late to jump on the smoothie bowl train but over the last year I have just fallen in love with them. There is a local spot called Kure that makes the best acai and smoothie bowls I have ever had. They are super creamy and topped with berries, bananas, granola and most importantly cinnamon; seriously just something about that cinnamon that makes the bowl so good. The problem is we no longer live close to Kure so now I have to make my own.

Smoothie Bowl

DIY Smoothie Bowl:

So a smoothie bowl has two main components a base which is basically a thick smoothie, a spoony -a smoothie that needs to be eaten with a spoon and a topping(s). 

For bases I love:

  • frozen bananas, strawberries, almond butter, almond milk + optional add-in’s of vanilla protein powder and/or acai powder
  • frozen bananas, mango, pineapple, coconut manana and coconut milk + optional add-in’s of spirulina powder and/or baby spinach
  • coconut water, kale, almond butter, coconut sugar and banana

Toppings I love:

  • Fresh Berries
  • Banana
  • Mango
  • Chia Seeds
  • Bee Pollen
  • Hemp hearts
  • Slivered Almonds
  • Honey
  • Cinnamon 
  • Granola

For the bowl pictured:

Base:
– 2 frozen bananas
– 1 juicy mango
– 8 oz coconut juice
– 1 heaping handful of baby spinach

Toppings:
– chia seeds
– hemp hearts
– bee pollen
– slivered almonds
– pinch of cinnamon

What is your favorite smoothie combination? Do you ever make smoothie bowls? If yes, what are your go to toppings? 

Here is another recipe for one of my favorite acai smoothie bowls. 

Tip: let your bananas get super spotty before peeling and freezing. Waiting until their super spotty makes them super sweet and helps us to better digest them.

Natural No Makeup Look | Featuring Mineral Fusion, W3LL PEOPLE, Everyday Mineral, Pacifica

Natural Makeup-header

One of my goals this year has been to do things for myself that make me feel good and one of those things is taking a few minutes and I mean just a few to do my makeup. I don’t feel like I have to wear makeup and most days I don’t but when I do I feel confident, put together and ready to take the world on. It’s crazy that just a little bit of light makeup can do all that but really it does. 

Today was one of those days that I decided that makeup was necessary because I had a blogger networking event to attend. I wanted to feel confident and pretty and put together but I also didn’t want to be too done up so I went for a fairly natural look. Keep reading to see what I used to create this look but first I’ll scare you with my naked face – BTW this is fair warning! 

Natural Makeup- Before

BOO! Did I scare you? Sorry! See below for my after photo.

Natural Makeup-after

A little less scary right?Natural Makeup-makeup

What I used to get this look (FYI I am no beauty guru):

  • Mineral Fusion Mattifying Primer*This step is completely optional but I have been trying out this Mineral Fusion Primer lately. I decided to go with the mattifying primer with Summer in mind because I have combination skin and Summer is when my oily skin likes to make it’s appearance. I am still on the fence as to whether I like this primer or not but I’m going to give it a few more tries before I say yay or nay. I have to say it did seem to be helping in keeping my makeup looking nice today though.
  • W3LL PEOPLE Narcissist Foundation Stick:  I lusted after this foundation for months before finally taking a plunge to buy this foundation because it’s on the pricy side. I’ll be honest the fact that I was able to get a Groupon to my local Pharamaca that made it half price really sealed the deal. Anyways I LOVE this foundation and definitely will repurchase in the future. The coverage is generally light to medium with the ability to build up easily. Of course today I was going for natural so I just did a light layer.  
  • Everyday Minerals Eye Shadows*: I chose to go with She’s True, a pure white, across my entire lid and up to the brow bone. I went back in with She’s Artistic, a golden sunshine yellow, on just my lid. I finished of the outer corner with She’s Laughter, a light charcoal brown, and I brought that into the crease for a little added depth. Don’t you love the names of these shadows? These colors made for a really nice natural eye look – perfect for my event. 
  • Under Eye Concealer: After wiping away the fallout from my mineral eye shadow I used a bit of under eye concealer. Right now I am using an old one from Physician’s Formula that I have had for far too long and probably shouldn’t be using anymore but I don’t have anything else and mama’s got dark circles for days. I am on the search for a really great natural one so any suggestions would be appreciated.
  • Mineral Fusion Setting Powder*: I dusted a bit of this setting powder all over my face and gently under the eyes. 
  • W3LL People Bio Brightener Stick: I put a bit of this on the corner of my eye to brighten it up, a little on my brow bone and on the tops of my check bones. I actually didn’t like this highlighter when I initially received it in a BirchBox months ago but I have grown to love it. This tiny pot has been going strong for months now and I use it to highlight the high points on my face. I like that it gives a little bit of a glisten without being over the top. Once this little pot is gone I’ll buy the full size because I like it that much. 
  • Pacifica Stellar Gaze Mascara in Supernova*: I finished the eyes off with a little big of mascara. I’ll be honest this is my favorite mascara but I have it so I am using it up. It’s okay for a few hours but I find the brush to be too fat and there is a bit of fall out after a few hours. I am curious how the water-resistant formula is – if you’ve tried it let me know in the comments below. 
  • Mineral Fusion Sheer Moisture Lip Tints*: For my blush I dabbed on this lip tint to add just a light bit of color on my cheeks and then I also used it on my lips to give them just a little color. 
  • My Makeup Brushes: I purchased my Everyday Minerals Makeup brushes from iHerb.com** and I absolutely love them. The other brushes I used were the Real Techniques Expert Face Brush** and the Real Techniques Blush Brush** and I bought them on Amazon – both are great brushes.

Natural Makeup-look

As I navigate my way through skincare and makeup I am attempting to follow a natural route or at least most of the time natural and always vegan/cruelty free. I have to say it’s been a bit of a learning curve because natural makeup, especially mineral eye shadow can be a little bit of a challenge to work with versus conventional makeup. That being said I have found a few products that I have really been loving and honestly a few I like but am still searching for new and better products. While I realize that beauty/skincare is a new topic for my blog it’s something I am very interested in and I want to share my journey with you. I hope you enjoyed this post and will enjoy future posts. 

What is your go to easy “no makeup” makeup look? Or do you prefer to go all out?

New to iHerb? Use coupon code SST123** for up to $10.00 off your first order.

Disclaimer: This post contains no sponsored content. Occasionally I am sent products for review but they will only be featured if I truly like them and use them regularly. If these appear in a post they will be marked above with a “*”. Everything else has been paid for by me! Affiliate links will  be marked above with “**”.

Fitness Friday | My Run Analysis at Therapydia PDX

fitnessfriday

Happy Friday! Sunday morning I received my run analysis from Jason at Therapydia Portland and I wanted to share it with you. For the run analysis Jason put little dots on my right side at all the points you see below for recording/analysis purposes. Once he did that I started walking at a level 3 on the treadmill for 3 minutes and then bumped the seed up too level 4/4.5 to a jog for 2 minutes.

Read my full Therapydia Portland post here.

Heads up the analysis is a bit technical so I moved it to the bottom for those of you who are interested in reading more! 

April 16, 2015

runanalysisheeltrikerLindsay Ingalls RUN ANALYSIS Summary:

Summary: If we increase your trunk flexion by 5-8 degrees you will help increase glut activation improve shock absorption throughout your run. During your deceleration phase your knee comes slightly in front of your toe during peak knee flexion, which indicates more quad dominant mechanics versus hip dominant.

Recommendations are to increase glut med/max strength couple with core stabilization exercises with resistance theraloop to improve motor control for SL stance. We will continue with hip isometric exercises with progression for higher levels as appropriate with efforts to improve single leg shock absorption on the right and concurrently decrease contralateral hip drop leading to asymmetrical stride.

Posterior view displayed significant hip drop on left side further indicating weak hip abductor muscles during shock absorption on the right in stance. Excessive pronation noted on bilateral feet.

runanalysisbackrun

runanalysisheeltrikerLindsay Ingalls RUN ANALYSIS Details:

During initial contact we are looking for what type of contact you make: You are a heel striker, which indicates that you will recruit your hip musculature more effectively versus calf musculature.  You have adequate ankle dorsiflexion however your hip flexion angle can improve. Decreased hip flexion angle at this phase can be caused by decreased velocity or inability to absorb shock at the glut med/max musculature.  Trunk is actually extended ~ .13 degrees and we look for ~ 10 degrees of trunk flexion.  We would like increased trunk flexion to recruit the hip shock absorption.  Ideally we look for 20-40 degrees of hip flexion during initial contact to improve glut activity. During initial contact optimal knee extension reaches 0 degrees.

runanalysisheel

Next phase is peak knee flexion, which indicates shock absorption or deceleration.  Ankle moves from ~4 degrees to 0 degrees indicating a 4 degree eccentric load, the knee goes from ~6 to ~26 degrees with a 20 degree eccentric quad load, and the hip remains moves from ~19 degrees towards ~14 degrees which indicates a negative shock absorption in the right hip.   Your knee has a good positive excursion however in the ankle we would like to see greater than 10 degree positive change and in the hip we would like to see the hip flexion angle increase indicating some shock absorption in the glut musculature. 

Next phase is toe off: We look at total hip excursion from initial contact to this phase: you have ~ 30 degrees of hip excursion, we would like to increase this by at least 10 more degrees.  We are working towards this via the hip flexor stretching. Trunk is flexed at 7 degrees, we can improve this at least 5 degrees. 

Last phase is just before initial contact. Hip is going back to a flexed position where we would like at least 20 degrees which you do very well!  Also we would like 8-10 degrees of trunk flexion which you have ~1 degree.

runanaylsis

Have you ever had a run analysis?

Read my full Therapydia Portland post here.

My Quick Night Skincare Routine + Pacifica Giveaway

quick night routine

Skincare has become really important to me over the past eight months and while I’d like to say that I am religious about doing an extensive night routine the truth is most nights I am rushing to get my face cleaned so that I can hop into bed and hopefully get a few hours of sleep. So unless I am wearing a full face of makeup or I have the forethought to do my full skincare routine hours before bedtime this is my current nighttime skincare routine. night routine pacifica

First I start with one of these facial towelettes from Pacifica. I use the Essential Makeup Removing* wipes (you can find these at Ulta) for those days when maybe I put on a little bit of tinted moisturizer and mascara but nothing else. I primarily use the Purify Coconut Water Cleansing Wipes which I have been buying for months now at Target (side note there is 5% of Pacifica items with the cartwheel app right now until 5/16/15- not sponsored just noticed when I was flipping through the app the other day.)  Both of these wipes are super gentle and easily take off the day.  I also love the coconut smell they both have. 

Next I go in with eye cream, serum and nighttime moisturizer. The Palmetto Derma eye cream I got as a deluxe sample in one of my Goodebox’s and I have simply been using it because I have it. I like it fine but it honestly hasn’t ‘wowed’ me so I won’t be repurchasing it at $44+ so when I run out I’ll be adding in a new eye cream – any recommendations? nightroutineskin

After that I go in with my Lotus Wei Quiet Mind Serum* and I put this all over the face, down my neck and behind my ears. This serum smells of geranium, lemon and coriander and combined make a super relaxing sent. This serum (there is also an elixir, mist, and perfume) is a balancing serum made of flower essence. It is suppose to dissolve a busy mind, mental chatter, restless sleep, physical tension (especially neck & shoulders) and over-analyzing. I have been using it regularly for about a month now and I have been feeling more relaxed at bedtime and more rested despite Alder’s need to be nursed all night. 

Lastly it is time to hydrate with my Weleda Iris Hydrating Night Cream**. I have combination skin (this cream is good for dry to combo skin) so this has been working well for me especially as the seasons change and my skin tends to get a bit drier. I love how easily is sinks into the skin and it leaves my skin soft. That being said as the seasons change and we get closer to summer my skin ends to get more on the oily side so I’ll probably be swapping this night cream out in a few weeks for a more combo to oily skin formula.  

So that’s it! This is my Quick Night Skincare Routine which usually takes me all of three minutes to do. What does your nighttime skincare routine look like when you just can’t be bothered to do a full cleanse?

Giveaway

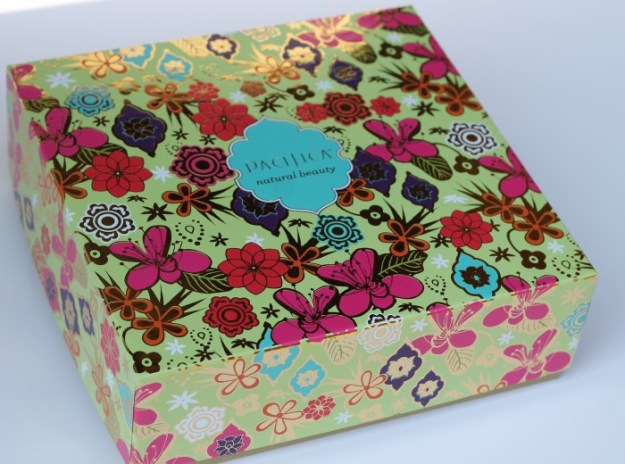
pacificabox

Now on to the giveaway! I have a fun box filled with Pacifica makeup and skincare items for you. I will be mailing this out myself so I am limiting this giveaway to US residents as it will be sent UPS. The giveaway will be open until 4/30/15. 

pacifica giveaway box
a Rafflecopter giveaway

Disclaimer: This post contains no sponsored content. Occasionally I am sent products for review but they will only be featured if I truly like them and use them regularly. If these appear in a post they will be marked above with a “*”. Everything else has been paid for by me! Affiliate links will  be marked above with “**”.